How to Transfer NFTs from OpenSea to MetaMask?
Non-fungible tokens (NFTs) have become a defining feature of the Web3 landscape, offering exclusive ownership of digital assets. OpenSea has emerged as a leading marketplace for NFTs, enabling users to buy, sell, and trade their digital collectibles, while MetaMask serves as a trusted cryptocurrency wallet and gateway to the decentralized ecosystem.
If you’re looking to transfer NFTs between wallets or to another recipient using OpenSea and MetaMask, this step-by-step guide will walk you through the process.
Step 1: Install and Set Up MetaMask
Begin by installing the MetaMask browser extension or mobile app. Visit metamask.io and follow the instructions to either create a new wallet or import an existing one. Make sure your MetaMask wallet is connected to the Ethereum mainnet and has a balance of Ether (ETH) to cover transaction fees.
Step 2: Log In to OpenSea
Navigate to OpenSea and log into your account using the MetaMask browser extension. Once logged in, access your profile by clicking your username in the top-right corner.
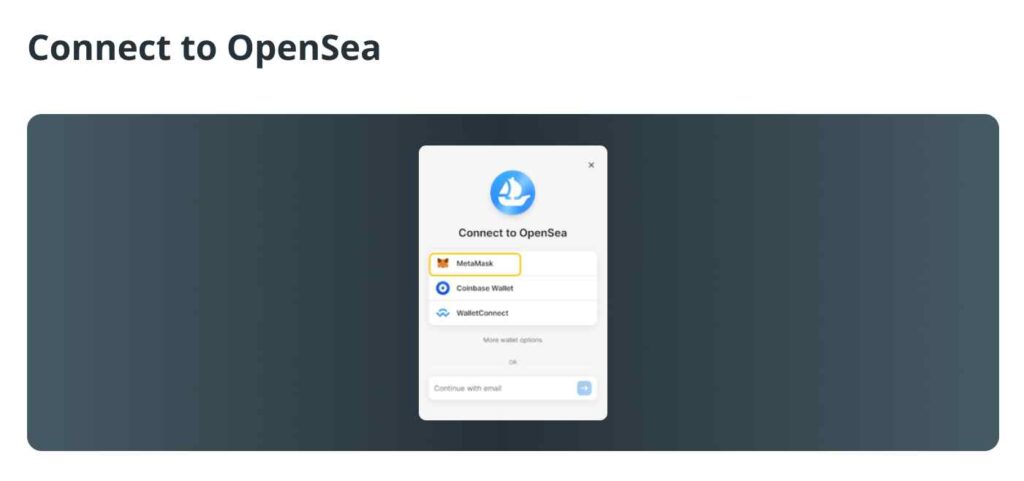
Step 3: Select the NFT You Wish to Transfer
From your OpenSea profile, locate the NFT you want to transfer. You can select it either from your collection or directly from its dedicated item page. Once you’ve found the NFT:
- On the Collection Page: Click the three-dot menu on the NFT card and choose “Transfer.”
- On the Item Page: Look for the arrow-shaped transfer button in the top-right corner.
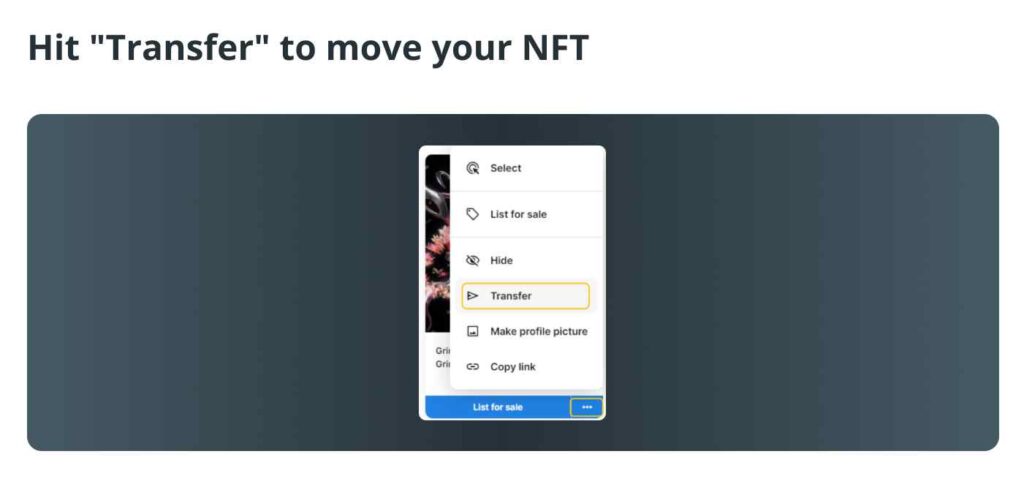
Step 4: Start the Transfer Process
Click the “Transfer” button, which will prompt a transfer form.
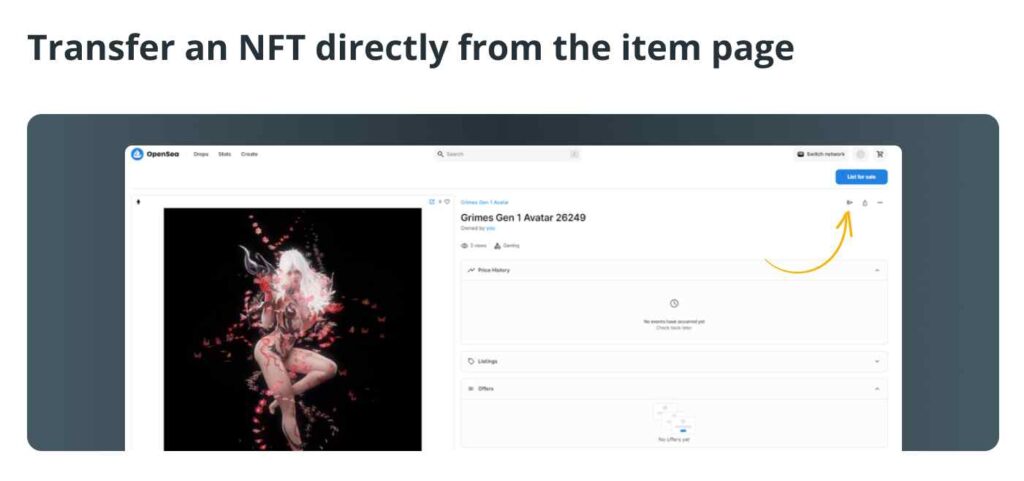
Step 5: Enter the Recipient’s Wallet Address
Provide the wallet address of the recipient. You can use the Ethereum Name Service (ENS) domain as an alternative if the recipient has one. Double-check the address to ensure it’s accurate.
Step 6: Confirm Transfer Details
Review the transaction details, including the NFT and recipient’s address. Once everything looks correct, click the “Transfer” button.
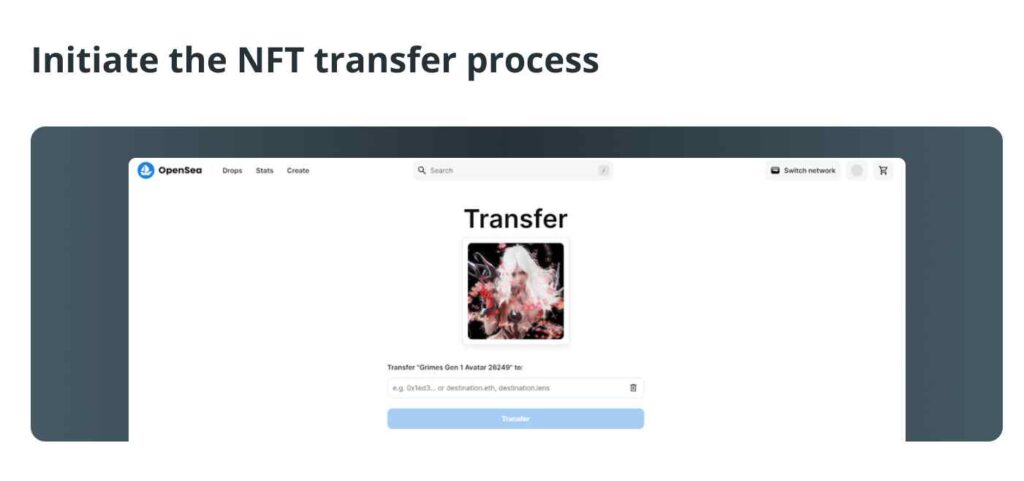
Step 7: Approve the Transaction in MetaMask
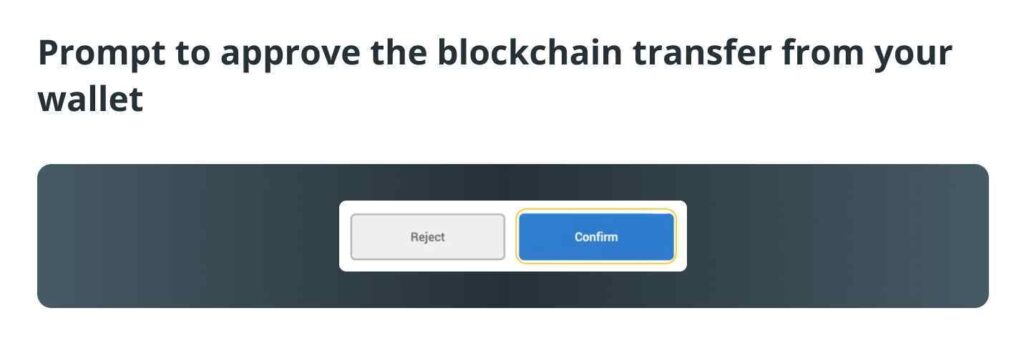
MetaMask will prompt you to approve the blockchain transaction. Open your MetaMask wallet and check for a notification or pending transaction. Review the details and confirm to complete the process.
Step 8: Wait for Blockchain Confirmation
Transaction times vary based on Ethereum network congestion, but most transfers are completed within minutes.
Step 9: Verify the Transfer
Once the transaction is successful, you’ll see a confirmation message. For additional assurance, you can view the transaction on a blockchain explorer like Etherscan.
Viewing NFTs in MetaMask
After the transfer, open MetaMask and navigate to the “NFTs” section to view your digital assets. The transferred NFT should appear there, along with any others you own.
Understanding OpenSea-to-MetaMask Fees
When transferring NFTs, you’ll need to pay a gas fee, which varies depending on Ethereum network activity. Fees typically range from $10 to $20. To save on transaction costs, consider using layer-2 (L2) networks like Polygon or Optimism, which are compatible with MetaMask.
Adding Layer-2 Networks to MetaMask
- Polygon Network
- RPC URL:
https://polygon-rpc.com - Symbol: MATIC
- Chain ID: 137
- RPC URL:
- Optimism Network
- RPC URL:
https://mainnet.optimism.io - Symbol: ETH
- Chain ID: 10
- RPC URL:
Once added, you can transfer NFTs directly to L2 addresses. Be sure to verify that your NFT is compatible with the chosen network before initiating the transfer.
Benefits of Using MetaMask for NFTs
- Enhanced Security: MetaMask employs advanced encryption and allows you to control private keys, minimizing exposure to centralized risks.
- True Ownership: By storing NFTs in a personal wallet, you gain full control over your digital assets.
- Interoperability: MetaMask’s compatibility with decentralized applications (DApps) and gaming platforms allows seamless integration of your NFTs.
- Portfolio Management: Track performance, transaction history, and access advanced wallet features.
For added security, consider storing high-value NFTs in a hardware wallet. These offline wallets, also known as cold wallets, provide an extra layer of protection.
Protecting Your MetaMask Wallet
While MetaMask is secure, it’s not immune to risks. Protect your wallet by:
- Avoiding phishing scams and fake extensions.
- Using a secure device and updated browser.
- Activating two-factor authentication (2FA) for additional protection.
By following these best practices, you can ensure the safe management of your NFTs and other digital assets.
Whether you’re a seasoned NFT collector or a newcomer, transferring your NFTs to MetaMask offers enhanced security, interoperability, and control. Enjoy exploring and managing your collection in the decentralized world!



Leave a comment